Wednesday, January 26, 2011

a new fancy dress

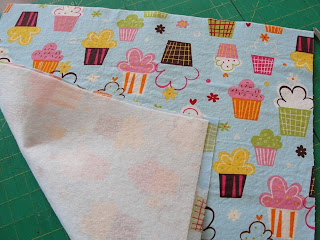
While I was sewing the boppy cover, Bug begged me to make her a 'fancy dress' next. It took me a day or two, but the nagging persisted and I eventually gave in and made her this.


 I was inspired by Project Run and Play's challenge using the Sweet Dress pattern, Jess's version- even though she got voted off :( The fabric is a super soft cotton that just came out from Moda, and I wish I could make one for me! However, the baby's growing and I am not sure I could handle that much floral in one dress at this point. 
As a side note, she's 4 today! She is thoroughly traumatized by the idea of not being 3 anymore, and refuses to turn 4. Her compromise is that she'll be "free-four" (three-four) for a while. She's not big on change, so I guess easing into another age shouldn't come as a surprise for us!

Monday, January 24, 2011

on the menu today...


... A tutorial!
It's been a while, huh?
I love giving my kids homemade gifts, and decided to make some Menus for Bug {E’s} Restaurant – the kid loves to ‘cook’ all day in her kitchen.

Supplies:

2 fat quarters – one each for front and back
Inkjet Printable Fabric sheet
Lightweight fusible interfacing
Medium weight fusible interfacing
Basic sewing supplies - thread, machine, rotary cutter, ruler & mat, etc.


I made my menu template in Microsoft Word. I fit four to a page. Once you are happy with the layout, print on regular paper… just to make sure you really like it. You should allow at least 3/8” on each side for seam allowance. If it looks okay, print on printable fabric sheet according to package directions.

Peel backing paper away and trim to size. Mine were just about 4” x 5”.
Cut 2” strips from one of your fat quarters. Using ¼” seam allowance, sew a piece on each side of your menu, trim to size and iron seams out


 Repeat for top and bottom.
I trimmed mine down a little here, to measure 6” x 7”. I suppose you could have just cut the strips at 1 3/4" to begin with... but sewing with two kids under foot I like to give myself a little room for error.
Attach lightweight fusible interfacing to these pieces following interfacing ironing recommendations.
With remaining fat quarter, attach medium weight interfacing to back and cut pieces to match menu front (6” x 7”).
 With right sides together, stitch, leaving a 3” opening for turning.
 Using a crochet hook, poke corners out to lay flat. Topstitch around edge at 1/8”. To further reinforce the interfacing, I also did a quick “stitch in the ditch” around the menu.
 Almost done! Repeat with other three menus and then… head over to Lia’s Crafty Journey for her great Lined Pouch tutorial that I used to make the holder for the menus!

Using her tutorial and two pieces of fabric measuring 8x20” (again with lightweight fusible interfacing on one fabric to make it a little sturdier) I made a great little pouch to put her menus away at the end of the day.


Finally, wrap and make a little girl you know very very happy on her birthday! How fun would this be given along with some felt food?

Saturday, January 22, 2011

sewing for baby

A long, long time ago I found this great Garnet Hill crib sheet- new in package - at the thrift store. I promptly cut it up to make a boppy cover, then abandoned it just as quickly. Now, 10 months later, I finally finished it! One of my favorite baby gifts to make are these boppy covers {with a new boppy of course}, probably because it is one of my must-have baby items for myself!

 I have to admit I am having a hard time getting excited sewing for this boy. I am just drawn to the prints and colors for my girls, but these trucks are adorable.
 I did a hidden zipper on the back and somehow got it to lay nice and even! 
So I decided to push my luck and make a little zipper pouch- just big enough for a couple diapers, wipes, and a change of clothes for the little dude. Cute enough for a little boy, but 'manly' enough my hubby can carry it through a store to change a diaper. Somehow the zipper turned out alright on this bag too! Any guesses on who influenced the fabric for the lining of this bag?

Friday, January 21, 2011

goody bags

My big girl is turning 4! This is the first year we have done a 'friends' party for her, and she has been super excited. I kept it small, just her four joy school friends plus one other good friend from church. As a 'goody bag' I made these drawstring pouches for the kids - Bug insisted the boys get Hello Kitty on theirs too.  
I could not find any Hello Kitty fabric at any of the stores I went to, but my favorite thrift store came through for me and I found a scrub top to cut up, hence the patches.

Tuesday, January 18, 2011

Mr. Gunny Bag

It was my week to teach Joy School again, and in the lesson they introduced "Mr. Gunny Bag". He "eats" all the toys that are still left out after you clean up! There is a cute song about it in the lesson & Bug is terrified he'll eat her toys, so maybe this will be a little incentive in our house to pick up all the toys at the end of the day.
To make him, I just did freehand fabric paint for teeth, eyes & eyebrows on a pillowcase - since I made it at 9:30 the night before school, I opted to keep it simple and I am glad I did!

Monday, January 17, 2011

Muffin Tin Monday

These girls love their muffin tin lunches!
Nothing super exciting today, with no theme I just gave them what I found first...
Kiwi, ham sandwich, apple slices, marshmallows, raisins & yogurt dip

I feel like I have finally recovered from my quick trip to California to see my Grandpa, and am feeling creative again... time to pick up my sewing machine from the repairman and get to work on something fun!

Thursday, January 6, 2011

.a.b.c.d.e.f.g.

We have been working with Bug on letter recognition and writing, so I made up these mini 'i spy' bags for her joy school friends for Christmas gifts. They measure just 3 3/4" square and have the alphabet in little colored letter beads inside, perfect size for taking out & about!

Tuesday, January 4, 2011

copycat

I have been super busy over the holidays, and it seems like i have had a hard time getting any projects finished. With the start of a new year, I am ready to finish {some of} what I started in the last month or two... I saw this post over at Samster Mommy and knew I wanted to make something like it. So, I browsed the J.Crew site until Bug started jumping up and down because she NEEDED this shirt:
I picked up two plain shirts and got to work! I only found silver sequins, so that's what I used, but I think the contrast is still great. I ended up stitching each sequin on with two stitches, so it was super time consuming.

I got the shirts for $3.50 each and split a $.97 package of sequins between the two, so total cost for two shirts: less than $8. Score! Much better on my pocketbook than the J.Crew original!
I enjoyed doing these so much I am thinking about making a goal of embellishing a plain shirt for each girl every month... just wondering what my craft time will be like in April with three kids! I am now 25 weeks along and super excited about having a BOY!
{my little sister - 22 weeks along - and I finishing up Christmas shopping a couple weeks ago. thinking maybe these cousing will need matching boy/girl quilts?}