... A tutorial!
It's been a while, huh?
I love giving my kids homemade gifts, and decided to make some Menus for Bug {E’s} Restaurant – the kid loves to ‘cook’ all day in her kitchen.
Supplies:
2 fat quarters – one each for front and back
Inkjet Printable Fabric sheet
Lightweight fusible interfacingMedium weight fusible interfacing
Basic sewing supplies - thread, machine, rotary cutter, ruler & mat, etc.
I made my menu template in Microsoft Word. I fit four to a page. Once you are happy with the layout, print on regular paper… just to make sure you really like it. You should allow at least 3/8” on each side for seam allowance. If it looks okay, print on printable fabric sheet according to package directions.
Peel backing paper away and trim to size. Mine were just about 4” x 5”.
Cut 2” strips from one of your fat quarters. Using ¼” seam allowance, sew a piece on each side of your menu, trim to size and iron seams outRepeat for top and bottom.
I trimmed mine down a little here, to measure 6” x 7”. I suppose you could have just cut the strips at 1 3/4" to begin with... but sewing with two kids under foot I like to give myself a little room for error.
Attach lightweight fusible interfacing to these pieces following interfacing ironing recommendations.
With remaining fat quarter, attach medium weight interfacing to back and cut pieces to match menu front (6” x 7”).
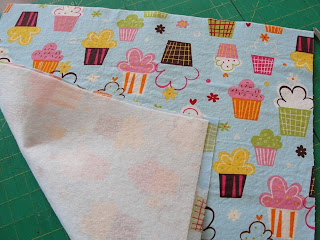
With right sides together, stitch, leaving a 3” opening for turning.
Using a crochet hook, poke corners out to lay flat. Topstitch around edge at 1/8”. To further reinforce the interfacing, I also did a quick “stitch in the ditch” around the menu.
Almost done! Repeat with other three menus and then… head over to Lia’s Crafty Journey for her great Lined Pouch tutorial that I used to make the holder for the menus! Using her tutorial and two pieces of fabric measuring 8x20” (again with lightweight fusible interfacing on one fabric to make it a little sturdier) I made a great little pouch to put her menus away at the end of the day.
Finally, wrap and make a little girl you know very very happy on her birthday! How fun would this be given along with some felt food?


Holy cow L you are TOO TOO brilliant! Want to come be my kids mom for a week?
ReplyDeleteI love the gorgeous fabrics you use! Whenever I find something I think I can't live without, I never do anything with it because I never know what to do! :-P but you ALWAYS use the best and brightest fabrics! I love your eye for color!
that is absolutely gorgeous :) beautiful fabrics, btw :) I love your tuto too :)
ReplyDeleteoh how fab is this! What a great gift for a little girl or boy!
ReplyDeleteI used your tutorial (with a few changes) to make some menus for my girls. Thanks so much for posting it!
ReplyDeletehttp://pumpkinsboutique.com/blog/2011/01/whats-on-the-menu/
I have a daycare and think these are the most amazing creation. They would be played with non-stop!! Now I just have to get someone to make them for me!
ReplyDelete